It All Ends
About Me

- Crystal Belle
- Greer, South Carolina, United States
- I have been psping since 2004, I just started making scrap kits in 2010. In my spare time I love to read, Harry Potter and Twilight Saga are my favorite books, I also read anything true crime.Im a huge Harry Potter fan! I finished up my associates degree in Criminal Justice, September 2010. Im extremely proud of my self! Thank you for stopping by my blog :)
Talk To Me
My Stalkers
Monday, April 18, 2011
 Key to my Heart

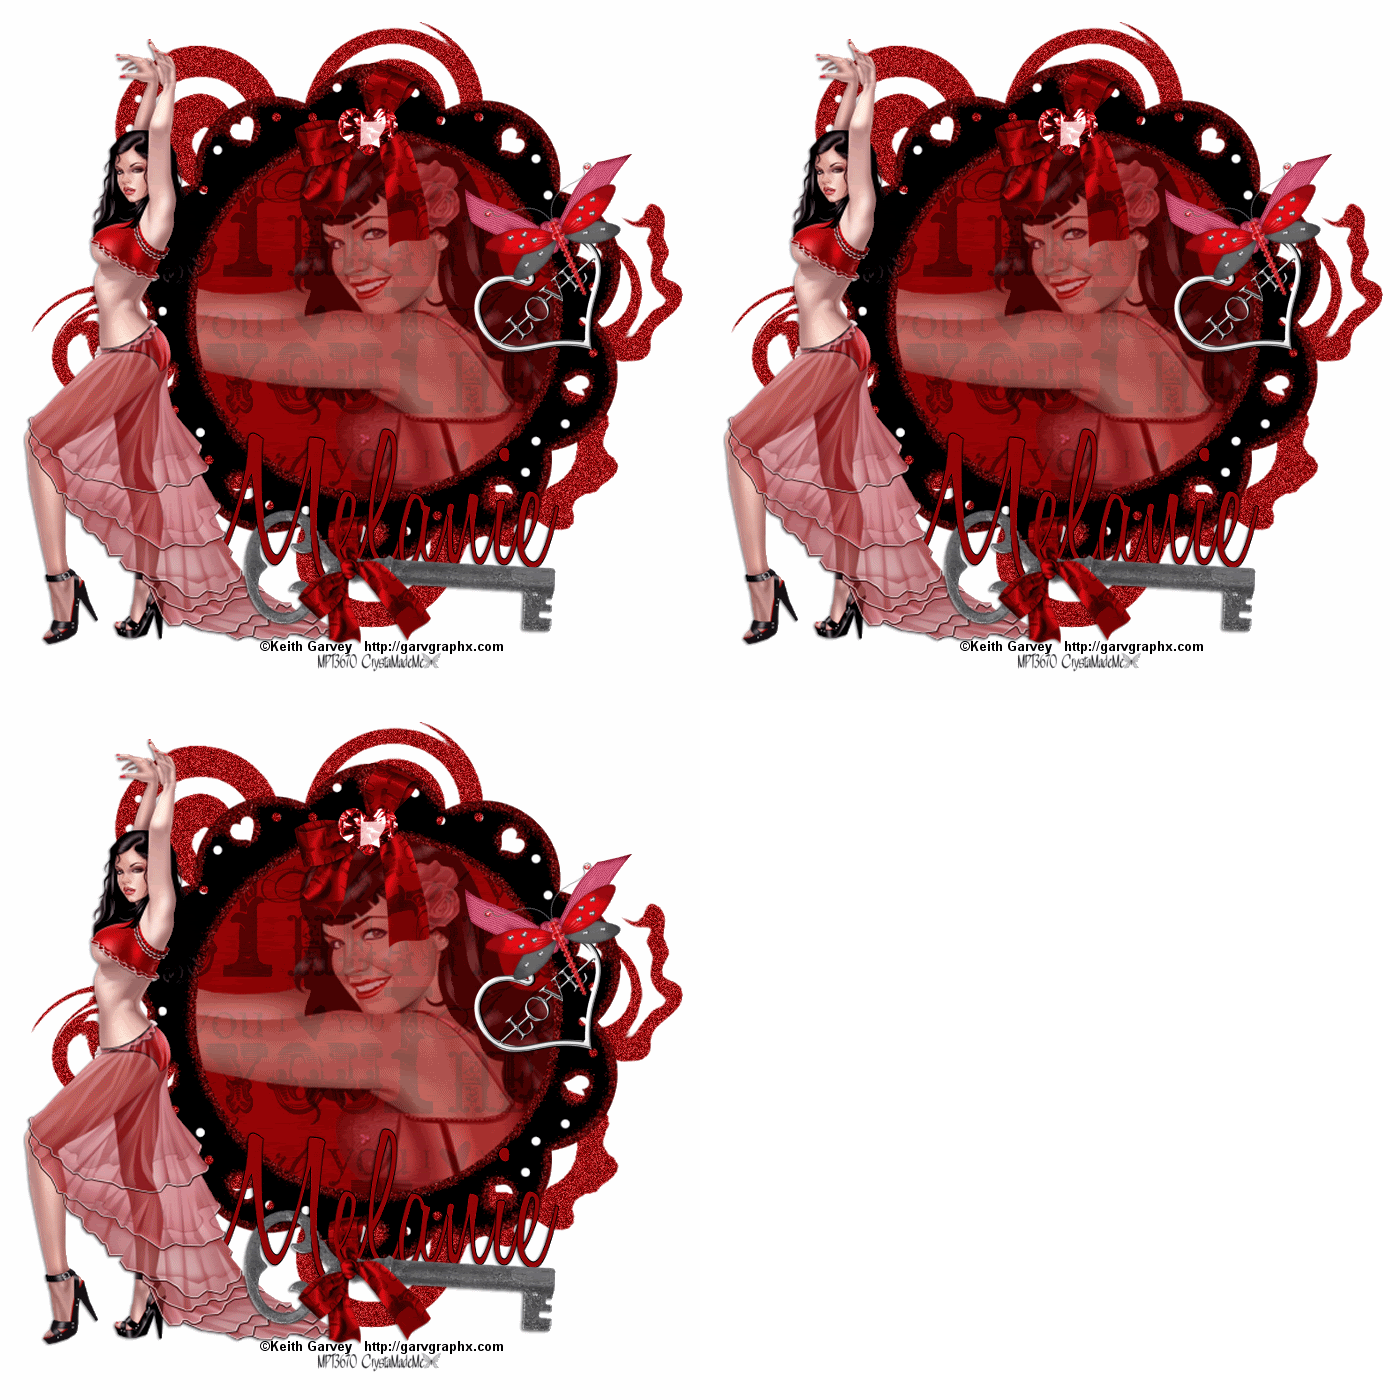
Plugin Dsb Flux/BrightNoise Font of Choice Animation Shop Tube of Choice .Iam using the wonderful artwork of Keith Garv.
Which you must obtain a license to use at PTE
Beautiful Scrap Kit By Missy from Misfits Scraps Called~I Heart You~ You can get this from her Blog Here
Open up a canvas 700x700 Flood fill White
Open Up Missy_iheartyou_frame2 Paste it and resize it to your liking I resized mine by 85%
Using your magic wand,Click inside your frame go to Sections/Modify/Expand x3
Copy and paste your Missy_iheartyou_paper 3 Resize your paper by 70% Sections/Invert and hit Delete
Make sure you move this layer under your frame layer Back on your frame layer click inside it again Sections/Modify/Expand by 3
Copy and paste your tube,Depending on your tube you may have to resize it do its bigger, To do this/Go to Image/Resize/150 (or what ever you feel comfortable with) Move the tube layer below your frame layer Change your Opacity do to 50%
Now close out your white background and merge your Frame/Paper and Tube layer togeather Copy and paste Missy_iheartyou_Doodle2 Move it below your frame layer and resize it by 120% Move it around so you can see it behind your frame layer (Do not merge this layer yet)
At this time,Lets go ahead and copy and paste your main tube,Place it where she looks best, I placed mine on the left hand side of my frame Go to effects Drop shadow and apply these settings 1/-1/50/3
Open up Missy_iheartyou_Loveribbon1 Resize by 50% Move it to the right of your frame (refer to tag) Open up Missy_iheartyou_Dragonfly2 Resize this by 50% Resize by 50% again rotate by 25% move the dragonfly so it sits above the loveribbon Open up Missy_iheartyou_bow4 resize by 50%
Move to the top of your frame Open up Missy_iheartyou_Heartgem2 Resize by 25%
Move this gem so it sits on your bow where the knot is. At this time you may add any other elements you would like. Lets add your name I used font SuzanneQuilSH Color Black for the Stroke #910406 for the fill Size 100 Stroke1
Add your Copywrite and Lic.Number
Now Go back down to your Doodle layer Make sure that layer is highlighted Go to DsbFlux/Bright Noise With These Settings Intensity 40 Mix Checked
Now Copy Merge over in to Animation Shop Back in psp hit your undo Add your Bright noise again Same settings only this time hit the Mix "Twice" Copy Merge and paste it in animation shop after current frame
Back in to PSP and hit your undo button Add Bright Noise again this time hit the Mix "Three" times Copy Merge in animation shop after current frame
Click View Animation,If you like what you see go ahead and Save.
Thank you for trying my tutorial,I hope you liked it. This tutorial was created on January /02/2009 by Ċrÿstàlßellĕ any resemblance to another Tag or Tutorial is purely coincidental.
Subscribe to:
Post Comments (Atom)
Grab My Blinkie

Artist and Such
- Anjara (1)
- Arthur Crowe (1)
- Barbara Jensen (4)
- Brian Gibbs (2)
- Christmas (1)
- Elias Chatzoudis (4)
- Exclusive (3)
- Free To Use Tubes (1)
- Halloween (2)
- Harry Potter (2)
- Ismael Rac (5)
- Jessica Dougherty (1)
- Just Scraps (4)
- Keith Garvey (7)
- New Years (1)
- Ted Hammond (1)
- Twilight (1)
- Valentines (1)
Tutorials
-
▼
2011
(33)
-
▼
April
(28)
- Naughty Bunny
- You Cant Handle
- Skater Chick
- Hello Spring
- One of a Kind
- Im a Naughty Stalker
- Glamorous
- So What!
- Mon Amour
- A Mothers Love
- The Creative Chicks
- Cherry Bomb
- Glam Princess
- Sweet Dreams or Beautiful Nighmare
- Garv Rocks!
- Paparazzi
- Key to my Heart
- Hawaiian Lily
- Romeo and Juliet
- Belle Hop
- Zodiac Babe (Cancer)
- Peaches and Cream
- Beautiful Fall Colors
- Happy New Year
- Girls With Guitars
- Forever Twilight Love
- Country Christmas
- Moving!
-
▼
April
(28)


0 comments:
Post a Comment