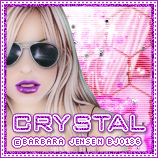
Potter_Obsessed


It All Ends

About Me
- Crystal Belle
- Greer, South Carolina, United States
- I have been psping since 2004, I just started making scrap kits in 2010. In my spare time I love to read, Harry Potter and Twilight Saga are my favorite books, I also read anything true crime.Im a huge Harry Potter fan! I finished up my associates degree in Criminal Justice, September 2010. Im extremely proud of my self! Thank you for stopping by my blog :)
Tuesday, July 26, 2011
 I Have a Wand

For this tutoial you will need
Tube of Choice: Im using my Commission Tube from Arthur Crowe..However you are able to get this tag from The Creative Chicks
Wizarding School scrap kit by Traci Reed and Meghan MullensYou can get this kit over at Sweet Shoppe Designs
Template 353 from Missy you can get this on her blog Divine Intentionz
Font of Choice: Im using Harry Potter
Eyecandy:Gradient Glow
Xero:Soft Vignette
This tutorial will follow the Wizarding School scrap kit..But any kit will do..Ready lets get started!
Open up the template Shift/D
Delete out the credit layer ,the wordart layer, both pixel wording layers and the small heart layers
Go to Image/Canvas Size and change it to 828x664
we are going to work from the bottom up
So starting with the Glitter Circle Right
Adjust/Hue and Saturation/Colorize
make sure both numbers are set to 0
Now go to Adjust/Color Balance/Manual Color Correction
Source~#e4e4e4
Target~#dec874
Move up to the Circle Right
Sections/Select all/Float/Defloat
Copy and paste Wizarding School solid paper 5
because these papers are so big we are going to have to resize them by 50% twice
Sections/Invert/ Delete
Do the same above to Glitter Circle Left
only this time on the Manual Correction change the numbers to
Source~#e4e4e4
Target~#bb2e36
Do the same above to the Circle Left
only use Wizarding School solid paper 6
add a drop shadoe to both glitter circle layers
3/0/50/2
On the Glitter Heart Layer
Adjust/Color Balance/Maunal Color Correction
Source~#e8e8e8
Target~#7a757f
On the heart layer
Sections/Select all/Float/Defloat
Copy and paste Wizarding School paper 6
Resize this paper by 50% twice and then 75% twice
move the paper so it sits in the heart
Sections/Invert/ Delete
Now on the Circle top Left we will do the same only this time use
Wizarding School paper 1
resize this paper 50% times two and then 75%
Using the same paper do the same to Circle Bottom Right
Delete out the bottom blue circle layers and add a drop shadow
On the Circle Center layer
Sections/Select All/Float/Defloat
Copy and Paste Wizarding School paper 6
resize by 25%
Sections/Invert/Delete
add a small gradient glow with this color #ccac4c
On the Frame background Layer
Do the same as above this time use
Wizarding Paper solid 7
resize this paper by 25%
Do the same to the Frame layer
using Wizarding School Paper3
resize by 25% and then again by 75%
Delete out the White frame layer
Go ahead and add a drop shadow to the frame layer
Back on the frame background layer we are going to add our tube..
Sections/Select All/Float/Defloat/
I had to do this 3 times to get a different piece of my tube in each frame
Make sure the tube is not over laping each other if so just useyour eraser tool and erase the part that is over laping
Once you have all your tube layers in place merge all of them togeather
Xero:Soft Vignette with these setting
Elliptical/Foreground Color/Solid/0/0/0/255
Now lets add our elements..
Copy and paste the blue glitter resize and move it to the bottom behind the Top Left Circle
Do the same to the Bottom Circle only this time use the Red Glitter
Copy and Paster the Star 4 resize by 50%
Move it so it sits above the first frame on the left
do the same above only use Star 1 and move it so its opposite of the yellow star and sits at the bottom right of the template
Copy and paster the Blue Ribbon resize by 25%
Move it so the bow sits by the Yellow star on top of the frame
Copy and paste the lightingbolt resize by 25%
rotate to the left by 10%
Place the lightingbolt on the right side so its over the last frame
add a drop shadow to this layer
Copy and paste the Glasses 1 resize by 25%
rotate to the right by 10%
Move the glasses so it sits almost at the tip of the lightingbolt
Resize them again by 75% and then again by 85%
Adjust/Sharpen
At this time go ahead and place your tube resize to your liking
place the tube on the right side where she is almost in the middle of the template
You still want to be able to see the tube you have in the middle frame
( you can refer back to my tag for correct placement)
Now copy and paste the Cauldron 2
resize by 25% and again by 50%
Place it at the bottom of the circle left
Copy and paste the Spellbook
Resize by 25% and again by 35%
Sharpen this image like we did the glasses
I did the sharpen twice
Image/rotate/Left by 15
Move the spellbook so its behind the cauldron
Copy and paste the Owl resize by 25% and then again by 55%
Move the owl so it sits at the bottom of the main black circle layer
add a drop shadow
Now lets add the text:
Using a font of choice write out Who Needs an Attitude
add noise of 45% and add a small gradient glow in #870009
Using the same font write out When I Have a Wand
Do the same gradient as above only change the color to #dcc568
Now lets add your name
Stroke~Null
Fill~#cbab49
rotate your name to the left by 15 and place it so its ontop of the spellbook but behind the cauldron
Sections/Select All
add a new layer move it below your name layer and fill it with #b1262d
Sections/Select None
Add some noise to this layer I use 35%
Add the copyright and Lic number.Resize to your liking Merge and save as PNG.
Thank you for trying my tutorial.This tutorial was created on July 26th,2011by CrystalBelle of Belle of the Ball Tutorials any resemblance to another Tag or Tutorial is purely coincidental

Sunday, July 24, 2011
Angelica
 1 Tube of choice : Im using the wonderful art work of Barbara Jensen..This is an exclusive tube you can only get at Scraps and the City
Angeliki scrap kit by Toxic Desirez you can get this at Scraps with Attitude
Template 43 from Scraps Rebellion you can get this from their blog
Font of choice : Im using Angelica
Xero-Porcelain and Radiance
Ready lets get started!
Open up the template/Shift and D
close out the original, and change the canvas size to 900x765
delete the credit layer
Make sure that the rectangle1 layer is active
Sections/Select all/Float/Defloat
Copy and paste Angeliki Paper10
Sections/Invert/ Delete
Copy and paste Angeliki Paper10
Sections/Invert/ Delete
Do this to the other rectangle layer as well
Back to rectangle1
Sections/Select all/Float/Defloat
Copy and paste your tube of choice
Copy and paste your tube of choice
Sections/Invert/ Delete
With your tube layer active apply Xero-Porcelain with these settings
50/128/128/0/0/255
Do the same thing to the rectangle 2 layer
Delete out the black rectangle layers and add a drop shadow
3/0/50/2
Make the thin black rectangle layer active
Sections/Select all/Float/Defloat
Copy and paste Angeliki paper 1
Copy and paste Angeliki paper 1
Sections/Invert/ Delete
do this to the pink rectangle layer as well only use Angeliki paper 4
Making the black circle layer active
Sections/Select all/Float/Defloat
Copy and paste the Angeliki paper 19
Copy and paste the Angeliki paper 19
Sections/Invert/Delete
Make the black circle layer active again
Sections/Select All/Float/Defloat
Paste your tube place it to that its comming out of the top
Duplicate the tube layer
Make sure you are back on the original layer
Sections/Invert/ Delete
Now on the duplicated layer, using your eraser erase part of the bottom of your tube so its not overlapping the botton of the circle and merge these two layers togeather
Apply Xero-Radiance with these settings
10/85/102/161
Go back up to the Glitterback 1
Adjust/Color Balance/Manual Color Correction
Source-#000000
Target-#00a8c6
Do this to the other side as well
Now down on the white star
Sections/Select all/Float/Defloat
Copy and paste Angeliki paper 13
Copy and paste Angeliki paper 13
Sections/Invert/ Delete
do the above steps but this time use part of your tube
and change the Blend Mode to Luminance (L)
Now lets add our elements
Copy and Paste Angeliki Cloud 1
Move it to the upper right corner behind the glitter rectangle
Duplicate and mirror
Copy and Paste the Angeliki Glitter
Move this to the left hand side so you can see it above and on the side of the template not so much on the bottom
Duplicate and Mirror this image
Copy and paste the Angeliki Halo
Resize by 50%
Rotate to the left by 25
Now using your eraser tool erase some of the halo so it looks like it is wrapped around the left top rectangle
Copy and paste the Angeliki Gem
resize by 50%
place this gem at the top right corner of the right rectangle
Duplicate and move this gem to the bottom left by the star
Copy and paste the Angeliki Lips 1
Mirror this image and move it to the left side above the star
add the same drop shadow as before
Copy and paste the Star Chain
resize by 75%
move this so it is up by the halo
(look at my tag if you need to :) )
add drop shadow
Copy and paste Angeliki Bow 3
resize by 50%
rotate to the right 25
move this to the bottom right rectangle, make sure it sits a little behind your tube if your tube had the wings,
Copy and paste the cherries
resize by 50%
place these on top of the bow..so the star gem on the cherries looks like it belongs on the bow's middle knot
Copy and paste Angeliki ribbon 2
This ribbon we want to move behind the tube layer so you cant see it ontop of the tube but you can see it on the sides.
Using font of choice size depending on your name I used size 72
Stroke-Null
Fill-White
type out your name, rotate it to the left by 25% move it so it sits inside the star
sections/select all/ modify and expand by 3
add a new layer move it below your name layer and fill it with
#89eaf7
add noise of 45%
add a drop shadow as before to that layer only
Go ahead and add the copyright and Lic number.
Merge and save as PNG.
Merge and save as PNG.
Thank you for trying my tutorial.This tutorial was created on July 24th,2011by CrystalBelle of Belle of the Ball Tutorials any resemblance to another Tag or Tutorial is purely coincidental.
Monday, June 27, 2011
Proud Gryffindor

For this tutoial you will need
Wizarding School scrap kit by Traci Reed and Meghan Mullens
You can get this kit over at Sweet Shoppe Designs
You can get this kit over at Sweet Shoppe Designs
Eyecandy 5 Impact- Glass
Xero- Fritillary
3 fonts of choice- one of these needs to be a fat font
I used Porky's
Start out with a canvas 1000x800
( Dont worry we will resize later)
Using your Fat font wrote out Gryffindor
Stroke #be3139
Fill Null
Move it to the center of the canvas
Using your magic wand Click inside every other letter
Modify and expand by 2
New layer and flood fill with
Do the same with the remaining letters only this time flood fill them with
#d8c05e
Bring the Stroke layer to the top
On the Gold letter layers add some noise
Gaussian 11%
Add it again
With the Red letter layer active
add Xero-Fritillary with these settings
5/31/100/54
Merge both letter layers togeather
Using your other Font ( I used AeronauBold)
Type out Proud
Stroke Null
Fill #404040
Size 75
Rotate 15 degrees to the left
Add Eye Candy Glass
with these settings
Bevel Width- 13.21
Opacity- 3
Inner Shadow- 5
Color- White
Rest of the boxes 0
Place it at the top of the G
Now lets decorate it!
Copy and paste the Wizard School Owl
Rezise it by 25% and then again by 75%
add the same Drop shadow as before
Add it again this time change the top number to 0 and the bottom to 3
Put the Owl above the N and the D so it looks like the Owl is standing on it
Copy and paste the Wizard School String 1
resize it by 35 and then again by 85
Place it above the G by the word Proud
make sure this layer is still behind the Owl
Copy and Paste Wizard School Magic Dust
resize by 25%
Move it to the very bottom make sure you can still see it sticking out behing the G
Duplicate and Mirror
copy and Paste the Wizard School lightingbolt
Resize 25% and then again by 75%
Rotate to the Right 15 degrees do this twice
Place it so it sits ontop of the O at the end
Using your eraser erase some of it so it looks like its going through the O
Copy and paste the Wizard School Glasses
Resize by 25% and then by 75%
Rotate to the left by 15
Now using your last Font of choice
Stroke Null
Fill- #c8b04e
Fill- #c8b04e
Size 100 depending on your name
add a small gradient glow
Merge resize and save as PNG.
Thank you for trying my tutorial.This tutorial was created on May 15th,2011by CrystalBelle of Belle of the Ball Tutorials any resemblance to another Tag or Tutorial is purely coincidental.
Monday, June 13, 2011
Thank you for the Award :)

Received this from the wonderful Creative Chicks @ The Creative Chicks Blog
Thank you Girls
xoxo
The aim of this award is to bring recognition to blogs with minimal followers.
Since I have accepted the award I must pass it on to at least 3 other blogs that have inspired me and I feel deserve a bit more attention.
The rules are to say thank you on my blog which you see above and to link their blog.
Pick the blogs to pass the award on to and then list them with links to their blogs.
Here are the blogs that I have chosen ♥
Marie's Place of Tut's ~ Marie
RoseBlack-Creations ~ Cindy
Scrapers Lodge ~ Anita
Wednesday, April 20, 2011
Naughty Bunny

1Tube of Choice, ( best to use one with a close up)
I'm using the wonderful art work of Keith Garvey. Which you must obtain a license to use at PTE
Naughty Valentine scrap kit by Toxic Desirez you can get this at Scraps with Attitude
I'm using the wonderful art work of Keith Garvey. Which you must obtain a license to use at PTE
Naughty Valentine scrap kit by Toxic Desirez you can get this at Scraps with Attitude
Template by Linda you can get this over at the Creative Misfits Blog(Its the 7th set down)
Xero- Porcelain and Radiance
Ready,
Lets get started!
Lets get started!
( I made this tag so you can use it anytime not just for Easter)
Open up the template shift and D close out the original, and delete the Linda layer
Make the Pink Rectangle layer activeSections/Select all/Float/Defloat Copy and paste Naughty Valentine Paper 9Now you want to move this paper so only the Naughty words shows.
(The valentine words will show at the top and bottom but we will fix that later) Sections/Invert/ Delete Make the Woman Left layer active
Sections/Select all/Float/Defloat Copy and paste Naughty Valentine Paper 4 Sections/Invert/ Delete and delete the woman layer, do this again to the right side
Make the Black Rectangle layer activeSections/Select all/Float/Defloat
Copy and paste Naughty Valentine Paper5 Sections/Invert/ Delete Make the Frame Layer active
Adjust/Add Noise/Uniform 45%add a drop shadow3/0/50/2
Make the Double Frame Layer activeAdjust/Color Balance/Manual Color Correction
Source~#ffffff
Target~#fcbfe4
Add the noise and drop shadow again
Make the Playboy Bunny left activeSections/Select all/Float/Defloat Copy and paste Naughty Valentine Paper 3 Sections/Invert/ Delete Delete out the playboy bunny layer
Do the same thing for the right side
add the same drop shadow as before to both of the bunnies
At this time you are going to need to move the black rectangle layer down to the double pink rectangle layers and merge them togeather
Now copy and paste a close up of the tube you want to use
Move it so its in the middle of the template
going across all 3 rectangles Sections/Select all/Float/Defloat/Invert
With your closeup still active we are going to add
Xero Porcelain
50/128/128/0/0/250
Then lets add Xero Radiance
128/50/128/255
Now change the canvas size to 750x675
Copy and paste your main tube, depending on what type of tube you are using place it where you think it looks best
I placed mine over on the right side add the drop shadow againChange the Playboy text to Overlay and add a small gradient glow to it
Now lets decorate :)
Copy and paste the Naughty Ribbon resize by 85% and move it down just a little bit ( you can refer to my tag for correct placement)
Add a drop shadow to itPaste the Fuzzy Cuffs resize by 50%Move these up to the left corner of the template
Using your eraser I used size 5 erase some of the hooks to it looks like they are wrapped around the frame
Paste the Naughty Condom and resize by 75%
Move it to the left bottom cornerPaste the Paddle and resize by 65%Place it on top of the condom
Paste the naughty Dice and resize by 50%Place these on top of the paddle and add the same drop shadow as before
Place the Naughty Sparkle Have this placed in the middle rectangle
Place the String resize by 75%Image Mirror and move it under all layersAdd the same drop shadow as before
Now lets add your name Font of choice Im using MoonDance Two
Size 80
Stroke 0
Fill~#f77cda
Add a new raster laterMove this under your name layer go back t your name layerSections/Select All/Float/Defloat/Expand x4
on the new raster layer flood fill with whiteAdd noise to the fill layer
and add the same drop shadow as before
Delete out the White Background Resize if needed and save as PNG
Delete out the White Background Resize if needed and save as PNG
Hope you enjoyed this tutorial
This tutorial was created on April 20th 2011 by CrystalBelle of Belle of the Ball Tutorials
This tutorial was created on April 20th 2011 by CrystalBelle of Belle of the Ball Tutorials
any resemblance to another Tag or Tutorial is purely coincidental.

Monday, April 18, 2011
You Cant Handle

This is an Exclusive tutorial only for The Creative Chicks So come on over we would love to have you!!
Skater Chick

This is an Exclusive tutorial only for The Creative Chicks So come on over we would love to have you!!
Hello Spring

Supplies Needed:
1 Tube of choice plus a close up: Im using the wonderful art work of Ismael Rac
Scrap Kit By Rieka_Rafita called Hello Spring
Template 94 by Rachel you can get this from her blog Scraps Of Enchantment
Xero/Porcelain
Font of Choice I used Scriptina
This Tutorial will follow the Hello Spring scrap kit but any kit will do
Open up the Template in psp
Shift and D close out the original
and delete the info layer
Make the Half Circle Top layer activeSections/Select All/Float/Defloat
Paste paper 16 Sections/Invert/Delete
Do this for the Half Circle Bottom
Make the Split Circle Frame activeSections/Select All/Float/Defloat
Paste paper 9Sections/Invert/Delete
Delete the original frame layer
Add a drop Shadow1/1/54/8
Make the Blur layer active Adjust/Color Balance/Manual Color CorrectionSource:#14bdee Target:#f45383
Make the Graident Layer Active Adjust/Color Balance/Manual Color Correction
Use the same colors as before this will get both the yellow and pink
Make the Frame layer active Sections/Select All/Float/Defloat
Paste paper 18Sections/Invert/DeleteDelete the original frame layer
Add a drop Shadow1/1/54/8
On the template delete the circle layers off we will not be using those
Now lets go back to the gradient layer
Sections/Select All/Float/Defloat
Paste your close up layer and place it where you like it Sections/Invert/Delete
Duplicate the tube layer
On the original layer Blur/Gaussian/3On the Duplicated layer use
Xero/Porcelain with these settings
50/128/128/0/0/255
Change the blend mode to Screen
Copy and paste your tube of choice place it on the left hand side of the Square
Go ahead and add the same drop shadow as before
Go ahead and make your gradient layer active again
Sections/Select All/Float/DefloatPaste the RR_Sparkle
Move it to the bottom half of the squareSections/Invert/DeleteDublicate/Flip
If there are any sparkles outside the Sguare frame go ahead and erase them
Paste the RR_Flower Spill
Move it to the very bottom
add a drop shadow3/0/50/2Paste the RR_Hello Spring wordartre
size by 50 and move it to the bottom right of the template
Add the same drop shadow as before do this twice
Place the RR_Ribbon 3 below the wordart and add a drop shadow
Using the RR_Bow2resize it by 50Place it to th top right of the square
add a dropshadowPaste the RR_Butterfly 3Resize it by 50% twiceImage/Rotate/25/leftDuplicate/Mirror/Flip/resize by 65
Sharpen the imageadd a drop shadow to both butterflies
add your name with a small graident glowPlace it where you like itGo ahead and add the copyright and Lic number.
Merge and save as PNG. Thank you for trying my tutorial.
This tutorial was created on March 29th,2011by CrystalBelle of Belle of the Ball Tutorials any resemblance to another Tag or Tutorial is purely coincidental.
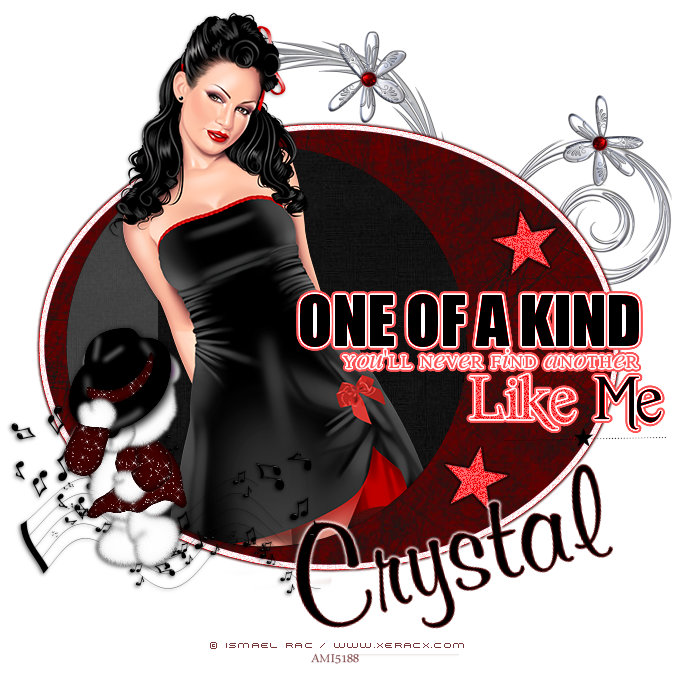
One of a Kind

1 Tubes of Choice ~I'm using the wonderful artwork of Ismael Rac. Which you must obtain a license to use at XeracX Store
Scrap Kit of Choice- I'm using Scrap Kit by Soxsational Scraps called King of Pop this is a PTU kit you can get at Twilight Scraps Here
Template #281 by Missy You can get this from her blog Here
Front of Choice- I'm using Fiolex Princess
Eye Candy 4000- Gradient Glow
Ready lets begin
I'm going to write the tutrial as if you are using the King of Pop Scrap Kit
Open up the Template by Missy, Delete out the "By Missy" layer
Go to canvas size and change the canvas size to 700x700 Make the Oval layer active, go to Sections/Select All/Float/Defloat Copy and paste the TW-KOP- Paper 9 Sections/Invert/Delete Select None
Make the Glitter Oval layer active Adjust/Hue-Saturation/Colorize/255 on both
Add a gradient glow with these settings 3/25/100 Color- # 390d0c Make the Circle layer active go to Sections/Select All/Float/Defloat
Copy and paste the TW-KOP- Paper 7 Sections/Invert/Delete Select None Make the circle layer active again go to Sections/Select All/Float/Defloat
Copy and paste your tube of choice Dublicate your tube,close out the dublicated layer On the original tube layer go to Sections/Invert/Delete Select none Now unhide the dublicated tube layer,
Using your eraser, erase the bottom part of the tube that is hanging over the circle
Merge both tube layers togeather and add a drop shadow 1/-1/40/5
Make the Word Art by Missy layer active Adjust/Hue-Saturation/Colorize/255 on both Do the same thing with both star layers.
Add a Add a gradient glow to the star layers only with these settings 3/25/100 Color- #000000
Open up the TW-KOP-Doodle 3 Move it to the bottom of your oval layers
Move it to the upper right of the oval Copy and paste the TW-KOP-MJbear1 Resize it by 50%
Move it to the left hand side of your tube Add the drop shadow as before.
Copy and paste the TW-KOP-MusicNotes 1 Place it under the bear Add the same drop shadow as before, but this time add it twice
Go ahead and add your name I'm using Fiolex Princess Size 100- Stroke-1 Colors- #540604/#000000
Add the same gradient glow as before but use the color white.
Now add the credit's and your licens number if using a PTU tube Merge all and save Thank you for trying my tutorial,Would love to see your results.
This tutorial was created on November,5th by CrystalBelle of Belle of the Ball Tutorials any resemblance to another Tag or Tutorial is purely coincidental.
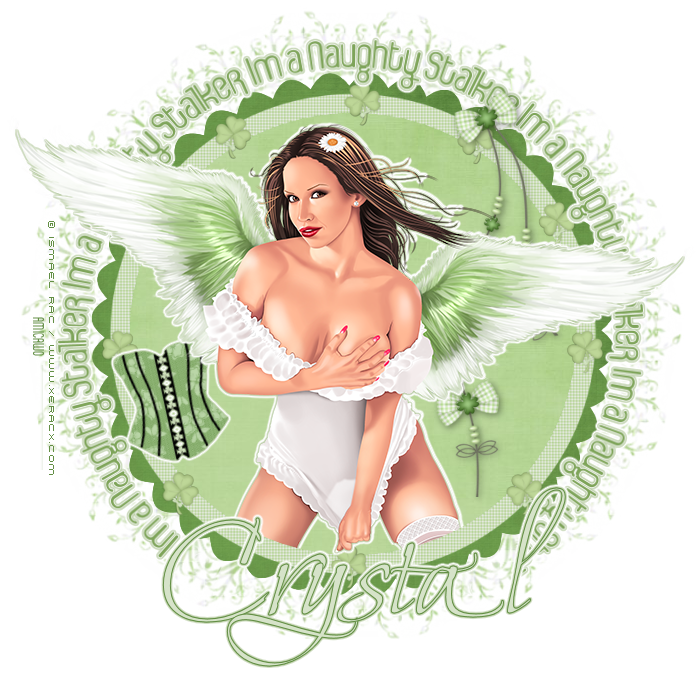
Im a Naughty Stalker

1 Tubes of Choice ~Iam using the wonderful artwork of Ismael Rac.
Which you must obtain a license to use at XeracX Store
Scrap Kit by Bluedream Designs called Irish Charm
Mask of Choice
Front of Choice- Im using IceCream Soda
Ok Lets get started
Open up canvas size 700x700
Copy and paste the Irish Charm paper 4 resize your frame by 84% Using your magic wand click inside your frame
Go to Sections/Modify/Expand by 5 Copy and paste Irish Paper 5 Sections/Invert/Delete Sections/ Select None
Move this layer under your frame layer
Go ahead and click inside the frame layer again with your magic wand Sections/Modify/Expand by5
Copy and paste your tube of choice rezise if needed and go to Sections/Invert/Delete
At this time I want you to add a Gradient Glow to your tube
So lets got to Eye Candy 4000/Gradient Glow with these settings 3/25/100
Under your color click on Fat/ I used a bit of green in there to go with the white because of my tube
Now Copy and paste your tube again make sure you have it lined up with the bottom tube
Now we want to keep this tube on top of the frame layer
Go ahead and add the same Gradient glow as before
Now you may have to erase a bit of your tube at the bottom if its hanging off
Now we are going to go ahead and add Im a Naughty Stalker that goes around your frame
To do this you want to Click on your top layer in your layer pallet and select your preset shapes icon
Using the circle draw a circle slightly larger then your fame leave that as a vector layer Choosing 2 color of choice from your tube..and font of choice Size 35 Make sure under Create As..you have selected Floating
Placing your test tool on the edge of your circle you should see a A with a Curve line under it.. Type out ..
Im a Naughty Stalker
Now it doesnt matter where it sits on your circle in your test box at the font of your test hit your spacebar untill you get your test where you want it..
Now over on your layer pallet delete the circle layer right click on your floating selection and promote selections to layer, Select none.
Add the same Gradent Glow as before Copy and paste the Irish Charm Pendant 1 and move it below your tube layer,
I placed mine on the right side of my frame
Add a drop shadow with these settings
2/2/40/10
Copy and Paste the Irish Charm Corset resize by 50 twice
Using the Deform tool rotate it to the left a bit I moved this over to the left side of my tube make sure it is below your tube layer
Add your Graident Glow again
Now lets add your Mask Copy and paste Irish Charm Paper 8
I had to resize my paper to make it bigger so lets resize your paper by 110%
Apply your mask,
over on your layer pallette delete out the mask layer amd merge group
I had to use the deform tool again to make my mask layer a bit bigger so you could see it below the frame layer
Add your name choose 2 colors from your tube
Add the same Graident Glow as before Go ahead and add the copyright and Lic number.
Delete out the white background if you have one and save as PNG.
Thank you for trying my tutorial.
This tutorial was created on October 4th by CrystalBelle of Belle of the Ball Tutorials any resemblance to another Tag or Tutorial is purely coincidental.
Glamorous
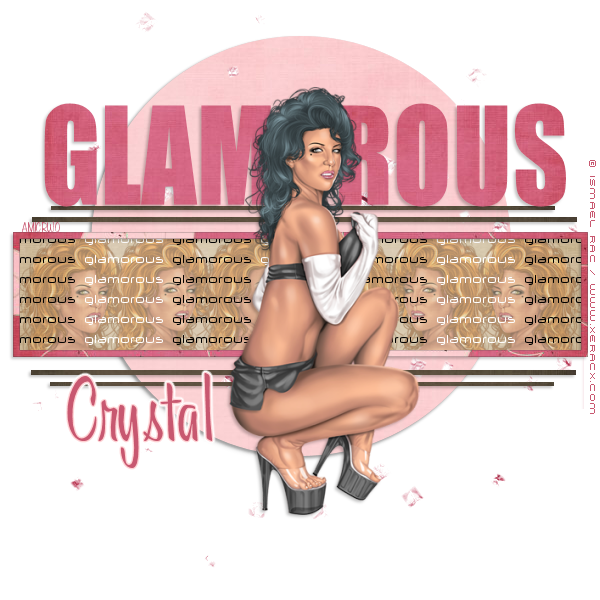 2 Tubes of Choice ~
Iam using the wonderful artwork of Ismael Rac.
Which you must obtain a license to use at XeracX Store
Scrap Kit by Bluedream Designs called Sweet Nothings
Ok Lets get started
Open up the Template delete the credit layer,
We are also going to delete layers WA1 and WA2.
Make your circle layer active.
Go to Selections/Select All/Float/Defloat Copy and paste the Sweet Nothings- Paper 6
Go to Selections/ Invert and hit Delete Selections/ Select None
Add a drop shadow~ 2 -2 24 4
Add the same drop shadow again
Make the Bar layer active.
Go to Selections/Select All/Float/Defloat
Copy and paste the Sweet Nothings- Paper 5
Go to Selections/ Invert and hit Delete Selections/ Select None
Add the same drop shadow as before.
Make the Frame1 Back layer active.
Go to Selections/Select All/Float/Defloat
Copy and paste the Sweet Nothings- Paper 4
Go to Selections/ Invert and hit Delete Selections/ Select None
Add the same drop shadow as before. Make the Frame 1 layer active. Go to Selections/Select All/Float/Defloat
Copy and paste the Sweet Nothings- Paper 10 Go to Selections/ Invert and hit Delete Selections/ Select None Add the same drop shadow as before.
Make the WA3 layer active.
Go to Selections/Select All/Float/Defloat
Copy and paste the Sweet Nothings- Paper 3 Go to Selections/ Invert and hit Delete Selections/ Select None
Now delete out the layer names WA3 Add the same drop shadow as before.
Now on both Glitter layers we are going to colorize them Hue-246/ Saturation- 129
Now lets go ahead and close off the WA4 layer Go back and make the Frame1Back layer active Selections/Select All/Float/Defloat
Copy and paste one of your tubes so only her head is showing in the frame
You may have to resize to make it fit. Go to Selections/ Invert and hit Delete Selections/ Select None Duplicate your head layer so you have a total of 3 Move each head over so that are next to each other.
Close out all layers except the 3 heads and merge them and duplicate them Go to image and mirror it.
Merge those two layers togeather. Drop the Opacity down to 50.
Unhide all layers Copy and paste your main tube place it where think it looks best. I placed mine in the middle of the Template.
Resize if needed and add the same drop shadow as before.
Lets go ahead and add your name Stroke ~Null Fill~ #C85870 Font of choice I used AL Meaningful Size 72
Using Eyecandy 4000 we are going to apply a Gradient Glow On the Basis put in these number ~ 3/24/100 for the Color we are going to click on Fat~ use White and the color # FED0D2.
Go ahead and add the copyright and Lic number. Delete out the white background if you have one and save as PNG. Thank you for trying my tutorial.
This tutorial was created on September 5th 2009 by CrystalBelle of Belle of the Ball Tutorials any resemblance to another Tag or Tutorial is purely coincidental.
So What!
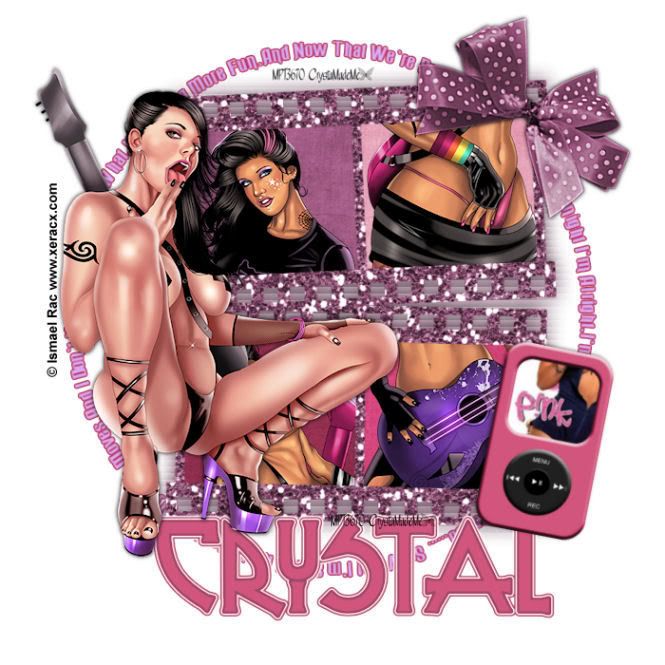 3 Tubes of Choice ~Iam using the wonderful artwork of Ismael Rac. Which you must obtain a license to use at XeracX Store (Now when I made this tutorial he was still with MPT that is why there is a MPT lic number on it).
 Please do not share with out my permision, This is my own creation
Eye Candy 4000/Gradient Glow
Front of choice~ I used Russel White
Ok Lets Get Started
Open up a canvas 700x700 Flood fill White
Open up the Girlx Rock Frame 1
and place it in the middle of your canvas
Resize by 85%
Click in side the first section of your frame
Section/Modify/Expan by 4
Copy and past a part of your first tube
inside the frame
Section/Invert/Delete
Move this layer under your frame
Using the same tube We are going to do the same thing only time time
Click inside the last frame on the bottom row
Use a different part of your tube.
Do the same thing to the remaining spaces on your frame
But use a different tube
Open up paper of choice
Using your magic wand click inside the 4 spaces of the frame
Paste your paper
Section/Invert/Delete
Move this layer under both your frame and your tube layers
Closing out your white Background Lets go ahead a merge the frame/Tubes/Paper Layer
Copy and paste your Main Tube Where you think it looks best
I placed mine on the left had side of my frame
Add a drop shadow 1/1/50/5 and again -1/-1/50/5
Open up the WordArt I provided
Move it below your frame and tube layer
Resize the layer by 90%
At this time change the color to best fit your tubes
Using Eye Candy 400/Gradient Glow
With these Settings
3/25/100
Under Color Select
Fat/White/BF2F52
Copy and Paste Bow #3 resize it 90% do this twice
Rotate by 45% to the Right
Adjust/Sharpen Do this twice
Now got to Adjust/Sharpen More
Move the bow to the top of your frame
On The right side
Add a drop shadow -1/1-/50/5
Add the drop shadow again this time changing it to 1/1/50/5
Go Back to your Frame layer Duplicate it using the Original Layer go to
Adjust/Blur/Gaussian Blur/10
Now go to Texture Effects/Blinds with this settings
7/30/Color Black
Make sure both Boxes are checked
Go ahead and do that again
At this time you may add any elements you would like to use
I used one of the Ipods and used a picture of Pink! since the lyrics in the word art are from her
song, Now we are going to add our name
The font I used was called Russel White
Size 100
Add the same Graident Glow as before only this time change the color to #905174
Add the gradent again
Add the copywrite and your Lic number if using PTU
This tutorial was created on March /01/2009 by Ċrÿstàlßellĕ of Belle of the Ball Turotials any resemblance to another Tag or Tutorial is purely coincidental.
Mon Amour

Tube of Choice
Eye Candy 5 Impact Glass
Scrap Kit By Designes by Ali called Toujours Et pour Jamais.
This is a PTU kit and you can get it from Taggers Delight
Everything in this tutorial is from this kit but you can use anything you like.
Lets get startedOpen up a 800x800 canvas
Dont worry we will resize later
Paste Frame 2resize by 75%Using your magic wand click inside each frame
Sections/Float/Defloat/Modify
expand by 8paste Paper 45Sections/Invert/DeleteSections/None
Move this layer under the frame layer
Make the frame layer active againCopy and paste your first tube in to the first frameDo this for each section of the frame using a different tube if you like
Rememeber to expand by 8 each timeAdd a drop shadow to the frame layer and your tube layers0/0/44/14
Paste the String 1 rotate to the right 90%move this below the frame and tube layersPaste Hearts 3resize by 50%
Mirror Image and Move it to the right hand side of the frame add the same drop shadow as before
Paste Glitter Stars 2resize by 75%Move it below all layersAdjust/Color Balance/ Manual Color CorrectionSource~ #ffffffTarget~ #f1da8c
Paste Heart Bow String 1Resize 50%/ Resize again by 75%move it to the left hand side of the frame( refere to tag)
Take your eraser and erase part of the top loop so it looks like the loop is hanging on the corner of the frame add draop shadow Paste Sequins 1resize by 75%
Move to the bottom of your frame layer and flip move it show it shows at the bottom of the frameadd drop shadow
Now Lets add your nameFont of choice I'm using Mon Amour ScriptSize 74Stroke 2 ~ #ddaca0 Fill~ #f2de85
Eye Candy 5 Impact Glass with these settingsFactory DefaultBasic~150/30/0/100/100/100/0/2/45/0
Glass Color~ #fdf1d5Add a drop shadw to your name 2/-2/10/10
Add the same drop shadow againResize to your likingand we are done!
This tutorial was created on July/26th/2010 by Ċrÿstàlßellĕ of Belle of the Ball Tutorials and Scraps any resemblance to another Tag or Tutorial is purely coincidental
A Mothers Love

You will need 1 picture of choice
I'm using one of my own
Scrap Kit By Laura's Designz called A Mothers Love.This is a PTU kit and you can get it from Taggers Delight
This tutorial will follow the scrap kit I used but any scrap kit will do.
Open up a canvas 700x700
Paste the Bracket Frame 2 and resize by 85%
Using your magic wand click inside the frame
Sections/modify/Expand by 3and paste your picture in the frame
Once you have your picture right go to Sections/invert and hit delete.
Now because I have a son I went ahead and added another frame behind my main frame
If you want to do this just follow these directions
Paste Bracket Frame 1
Move it below your picture and main frame layerResize by 90%
and rotate it to the left by 25 degrees
Go to adjust color balance and click on Manuel Color Correction change the Source color to/ #9379b4
Change the target color to #7a7cde click ok, and then go back in and do it again this time just click ok ( do not change the colors)
Now using your magic wand click inside the blue frame sections/modify/expand by 3
Paste paper 35 resize by 75% Sections/invert/delete
move this paper so it is under the blue frame
Go to adjust color balance and click on Manuel Color Correction change the Source color to/ ##ad9fbd Change the target color to #7a7cde
Add a drop shadow to the frame layer 2/2/50/2
Add the same drop shadow to the pink frame layer
Paste the Doodle #5 and resize it by 85
Move it so it shows a little bit up on the left of the bottom fame, and than move it to the bottom.
Go to adjust color balance and click on Manuel Color Correction change the Source color to/ #ad9fbd Change the target color to #7a7cde
Duplicate/mirror/flip
Go to adjust color balance and click on Manuel Color Correction change the Source color to/ #6259dd Change the target color to #deb5c1
Paste the ribbon heart 1 resize by 50 resize again by 75
Move this to the bottom of your frame on the left side
add the same drop shadow as before
Paste Satin Bow 3 resize by 50 and place it at the bottom of the top frame
add your drop shadow
Paste rose 3 resize by 50 and move it to the left of the pink frame and move it under the ribbon heart
Duplicate and rotate to the left by 25 degrees using your freehand section circle the pink rose and only the pink rose
Go to adjust color balance and click on Manuel Color Correction change the Source color to/ #ecdae1 Change the target color to/ #9badf1
Add the same drop shadow as before
Lets add your name
Font of choice I used Snapper Scriptstroke/fill/#5c54d1stroke width 2
I placed my name at the bottom of the bow
I added a gradient glow3/25/100Color/#5c54d1
Add the same glow again this time change the color to#dfb6c2
Delete out the White Background
Resize if needed and save as PNG
This tutorial was created on July/6th/2010 by Ċrÿstàlßellĕ of Belle of the Ball Tutorials and Scraps any resemblance to another Tag or Tutorial is purely coincidental.

Cherry Bomb
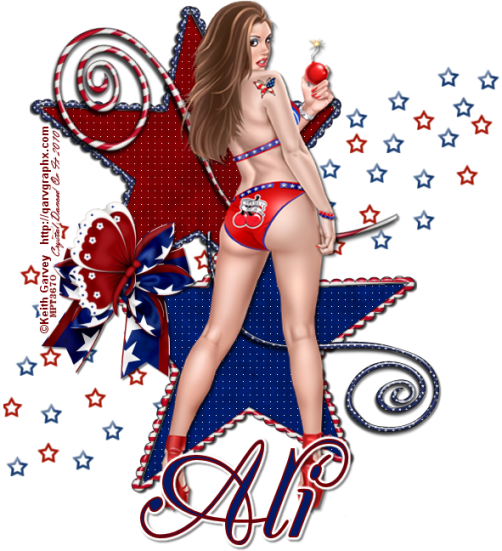
1Tube of Choice,
I'm using the wonderful art work of Keith Garvey. Which you must obtain a license to use at PTE
Scrap Kit By Designes by Ali called American Pride.This is a PTU kit and you can get it from Taggers Delight
This tutorial will follow the scrap kit I used but any scrap kit will do.
Open up a canvas 700x700Flood fill white
Paste DBA Frame #2resize by 65% Using your magic wand click inside the frame Sections/Modify/Expand by 3
Paste paper 21Sections/Invert/Delete Move this under the frame layer
Paste DBA Frame #3resize by 65% Go to Image and Mirror it
Move this so that it over laps the bottom of the first star
Using your magic wand click inside the frame Sections/Modify/Expand by 3
Paste paper 20Sections/Invert/Delete
Move this under the frame layer
Click on paper 21 in your first frame Effects/Texture/ Weave
Use these setting1/7/1/fill gaps checks
Make sure post colors are white
Do the same for the bottom paper also.
Close out all layers except both frames and both papers
Merge visible.
Copy and paste your tube of choice
Add a drop shadow2/2/50/2
Paste the Star Mess #3
resize by 85%Move it under your frame layersPaste Bow #7resize by 50#
Place it on the left hand side kind of on the edge where the 2 frames come togeather add the same drop shadow as before
Paste Butterfly #3resize by 50%resize again by 85%Move it so it sits on top of the bowadd the same drop shadow as before
Paste Doodle # 3resize by 50%Mirror the imageplace it at the bottom right of the bottom framePaste Doodle #3resize by 65%Rotate to the right 65 degreesMove it to the top left corner of the top frameAdd the same drop shadow to both doodles
Now lets add our nameFont I used is calledSilk Scritp AltSize 100Stroke-#760003Fill-#011b66I added a small graident glowwith these settings3/25/100Color White and I clicked on Fat Now add the same drop shadow as before
Add the Credit and your License Number is using PTU Delete out the White Background Resize if needed and save as PNG
This tutorial was created on June/26th/2010 by Ċrÿstàlßellĕ of Belle of the Ball Tutorials and Scraps any resemblance to another Tag or Tutorial is purely coincidental.
Glam Princess

5 Tubes of Choice,
I'm using the wonderful art work of Keith Garvey. Which you must obtain a license to use at PTE
Scrap Kit By Tamie from ADDICTIVE PLEASURES called Glam Princess.
This is a PTU kit and you can get it from Twilight Scraps
Eye Candy 4000-Gradient Glow
This tutorial will follow the scrap kit I used but any scrap kit will do.
Open up a canvas 700x700
Paste the filmstrip and resize by 85%
Using your magic wand click in side the first frame.Sections/Modify/Expand by 3
Paste paper 11Sections/Invert/Delete
Move this under the frame layer
Contuine doing this for the next frames using a different paper.
Using your magic wand again click in side one of the frames Sections/Modify/Expand by 3
Paste your tube of choice Sections/Invert/Delete Move it under the frame layer
Contuine doing this for the next frames using a different tube each time.
Make sure your 5th tube is a tube that is laying down.
Place it at the top of the film strip
Paste ribbon 5 and move it to the bottom of all the layers
Place it to you can see it from the bottom of the filmstrip
add a drop shadow3/0/50/2
Paste the shoe2 resize it by 25% place it on the left side bottom filmstrip
Paste the sparklesmove it to the top of the filmstrip add a small gradient glow3/25/100#a6a9e2
Paste the Glitter resize by 75%
Move it to the very bottomDuplicate/Mirror
Paste Bow 6 resize by 45%Rotate to the left by 45
Move it to the top left of the filmstrip
Layers duplicate image mirror
At this time add any other elements you would like I added some makeup, and another ribbon at the bottom of the filmstrip
Using font of choice I used SandyTextHmkBoldSize 100 Stroke 1Forground/#f4c4e7Background/#a1ace2
Add the same drop shadow as before
Add the Credit and your License Number is using PTU Delete out the White Background
Resize if needed and save as PNG
This tutorial was created on February/26th/2010 by Ċrÿstàlßellĕ of Belle of the Ball Tutorials and Scraps any resemblance to another Tag or Tutorial is purely coincidental.
Subscribe to:
Posts (Atom)
Grab My Blinkie

Proud Member Of

People I Stalk


