Potter_Obsessed


It All Ends

About Me
- Crystal Belle
- Greer, South Carolina, United States
- I have been psping since 2004, I just started making scrap kits in 2010. In my spare time I love to read, Harry Potter and Twilight Saga are my favorite books, I also read anything true crime.Im a huge Harry Potter fan! I finished up my associates degree in Criminal Justice, September 2010. Im extremely proud of my self! Thank you for stopping by my blog :)
Showing posts with label Elias Chatzoudis. Show all posts
Showing posts with label Elias Chatzoudis. Show all posts
Monday, April 18, 2011
 Sweet Dreams or Beautiful Nighmare

 Posted by
Crystal Belle
Posted by
Crystal Belle
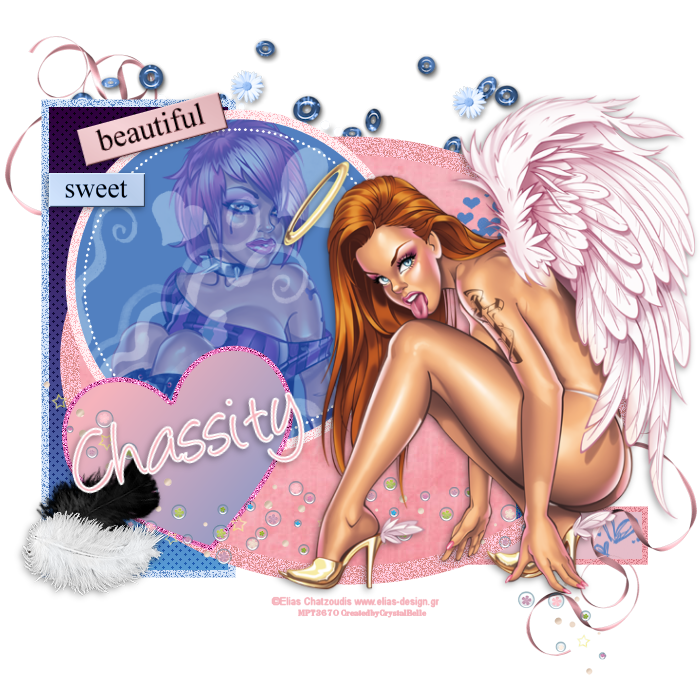 2 Tubes of Choice, I'm using the wonderful art work of Elias Chatzoudis. Which you must obtain a license to use at PTE Collab Template #7 by Rose and Kristin. You can get this from ☠Toxic Desirez☠ Scrap Kit by PolkaDot Scraps by Chassity Kit is called Sweet Dreams Beautiful Nightmare this is a PTU kit from Twilight Scraps Ready, Lets get started! Open up the Rose and Kristin Collab template #7, Delete out the credit layer.Go to image/canvas size resite it to 700x700 Click on Layer 5 ~ Go to Adjust/Color Balance/Manuel Color CorrectionsUse these numbers H~152S~119L~137Make sure that the Color Source is the pink that is inside the circle, this way the color will be right. Still on this layer go to Sections/Select all/Float/Defloat copy and paste your tube of choice in side the circleSections/invert/delete. Change the Blend Mode to Soft LightClick on layer 3Sections/Select All/Float/DefloatSections/Modify x2Copy and paste PDS_SDBN-paper8Sections/invert/deleteClick on Layer 12 Go to Adjust/Color Balance/Manuel Color CorrectionsUse these numbers H~152S~119L~137 Click on the Source Color and use the light pink that is on this layer for this color. Click on Layer 11 Go to Adjust/Color Balance/Manuel Color Corrections Use these numbers H~152S~119L~137 Make the Source Color Light GreyDo the same thing for layer 4 Change the source color the Light Grey and use these numbersH~250S~211L~209 Click on Layer 10 Change the source color the color of the square and use these numbersH~243S~115L~210 Click on Layer 7Adjust/Add and Remove Noise/Add noise 50%Uniform ~CheckedMonochrome~ Unchecked Still on layer 7 Go to Adjust/Color Balance/Manuel Color CorrectionsUse these numbers H~152S~119L~137 Make the Source Color White Using these same settings go ahead and do this for Layers 16 and 17 Copy and paste your main tube place it where you think it looks best Add a drop Shadow with these settings2/-2/40/10 Copy and paste PDS_SDBN-Element14 Move this layer below your main tube layer and move it to the bottom of the template Copy and paste PDS_SDBN-Element2 resize by 50% and move it the left hand side of the square layer Copy and paste PDS_SDBN-Element43 Move it below all your on your template Place it towards the top so you can see it above the templates( You can refer to my tag) Copy and paste PDS_SDBN-Element56resize by 50%Go to Adjust/Color Balance/Manuel Color CorrectionsUse these numbers H~251S~109L~206 Make the Source Color White Rotate to the left by15% Copy and paste PDS_SDBN-Element27 resize by 50% Go to Adjust/Color Balance/Manuel Color CorrectionsUse these numbers H~152S~170L~219 Make the Source Color White Move it to the left side below the Beautiful layer Add the same drop shadow as before to both these layers. Copy and paste PDS_SDBN-Element23 resize by 50% move this to the top corner of the Rectangel, Duplicate this layer mirror and flip I also went ahead and added the black feather below the white one. And added the same drop shadow as before to both layer. Using your font of choice I used Angelina Size 72Stroke 2White/#f6b3bc Rotate to the left 15% and add the same drop shadow as before Add the Credit and your License Number if using PTU Delete out the White Background Resize if needed and save as PNG This tutorial was created on January/29th/2010 by Ċrÿstàlßellĕ of Belle of the Ball Tutorials and Scraps any resemblance to another Tag or Tutorial is purely coincidental.
  Labels:

Hawaiian Lily
Posted by
Crystal Belle
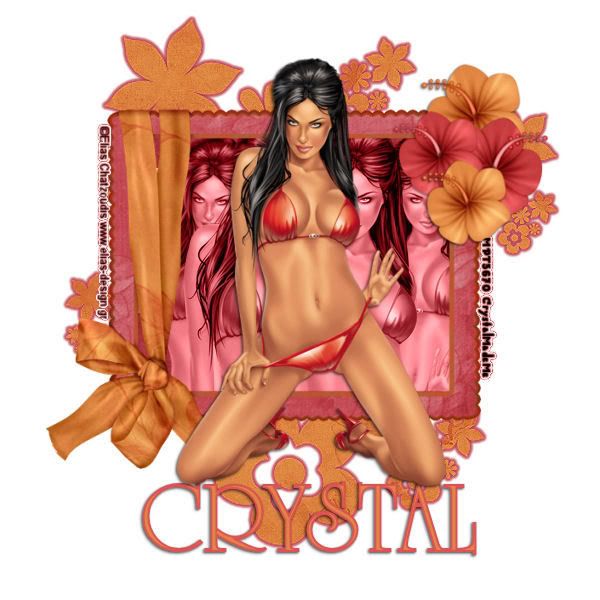 Thank you Melanie for Naming my tutorial
 This tutorial was created on December /30/2008 by Ċrÿstàlßellĕ any resemblance to another Tag or Tutorial is purely coincidental.
This tag was created in PSP 9 and can be done in other versions
You will need: Font of Choice Eyecandy 4000/Gradient Glow Tube of Choice .Iam using the wonderful artwork of Elias Chatzoudis.which you must obtain a license to use at PTE
Open up a canvas 700x700 Flood fill White
Copy and paste your fame resize by 85% using your magic wand click in side the fame, Sections/Modify/expand~5
Copy and paste your paper,sections invert delete
Copy and paste your tube inside the frame/Sections/invert/delete,you want to do this as many times as it takes to fill up your frame
Now just on your tubes I want you to merge them visible,
Change your blend mode to Luminlance (L)
Close out your white back ground, and merge layers visible.
Copy and pasteyour tube.depending on size of the tube you may want to resize it,
I resized min85% add a drop shadow 1 -1 50 3
Paste another scrap paper,move this paper below all your layes except the white background
Load mask of choice I used EBDMask 7 delete the mask layer it will pop up saying if you are sure.
Click yes.
Now merge group layer visible.
On your mask layer we are going to add a Eye candy/ gradent glow/ 3/25/100~Choose a color that complments your tube,
Go adead and add the gradent glow again.
Now go to Adjust/ Sharpen/Sharpen more/I did this twice
At this time add any elements you would like.
Add your name and copyright and you are done Thank you for trying my tutorial
Romeo and Juliet
Posted by
Crystal Belle

This tutorial was created on November /07/2008 by Ċrÿstàlßellĕ any resemblance to another Tag or Tutorial is purely coincidental.
This tag was created in PSP 9 and can be done in other versions
You will need: Font of Choice
Movie Poster of your choice..
This you can find on photobucket
Script of Choice
Eye candy 4000/Gradient Glow
Tube of Choice .Iam using the wonderful artwork of Elias Chatzoudis.which you must obtain a license to use at PSP Tubes Emporium
ScrapKit Movie Night by Designs by Bittersweet. If you wish to purchase this awesome scrapkit, you can Here(( Im sorry but BitterSweets has closed up her shop and stopped selling her scraps, If you do not have this kit there is no way to get it now. Im so sorry.)
Open up a canvas size 700x700..
Dont worry we will resize later..
Fill in with White
Open up Curled Ribbon Frame of your choice..
I used the pink one Resize by 65% Using your magic want click inside the frame.. Sections/Modify/Expand by 3
Give it a nice drop shadow V~ -1 H ~ 1 Opacity ~50 Blur ~5 Color~Black
Open up Movie Night paper 9,Copy and paste it below your frame layer Sectons/Invert/Delete (Make sure it is under your fame layer)
At the time I went ahead and pasted the tube
Depending on your tube you may want to resize it.
Paste the tube above your frame layer..
Erase any of the tube that is over laping the bottom of the fame
Apply the same drop shadow as we did to the frame layer
Closing out your white background...
Merge the fame/paper and tube layers visible
Unhide your white background
Open up Movie Night Doddle 6 Resize by 75%
Move this layer below your merged layers (If you notice you will see a bit of the doodle at the bottom go ahead and erase that..
(You can see what Im talking about in the preview below)
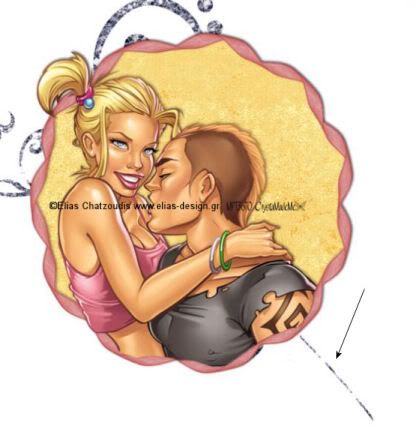
Duplicate your Doodle laye Image/Flip/Image Mirror
You can move these around to where you like them best.
Merge the doodle layers togeather
add the same drop shadow as before
Paste the pop corn on the right se..resize by 45%
Paste the Soda cups infront of the popcorn resize 45%
Open up the movie poster of your choice..
Im using Romeo and Juliet as it is one of my favorite movies
Depending on the size you may want to resize it
Image rotate and rotate it by 45% to the right
I placed mine behind my popcorn but left out enough so you can still see it..
You can place it where ever you feel looks best on your tag at this time you can add any other elements you would like..
Now to add some of the script I had to search the internet to find the script I wanted to use
Click on your top layer in your layer pallet and select your preset shapes icon
Using the circle draw a circle slightly larger then your fame leave that as a vector layer
Choosing a color of choice from your tube..and font of choice with these settings text size 20 Stroke Null Make sure under Create As..you have selected Floating Placing your test tool on the edge of your cicle you should see a A with a Curve line under it..
Type out ..Your Scrpit.. Now it doesnt matter where it sits on your circle in your test box at the font of your test hit your spacebar untill you get your script where you want it..
Now over on your layer pallet delete the circle layer right click on your floating selection and promote selections to layer, Select none.
Go to eye candy 4000/Gradient Glow/I used the color #f6dc87 (was the color of my paper in my fame)
Lets add your name Font of choice Depending on your name you can go smaller or larger..
I used size 48 Stroke~1 Forground Color~#f9e6ad Background Color~#eb8585
Add the same drop shadow as before.
Add the copyright..and lic number if using ptu art. resize 85% Merge All Flatten And Save
Thank you for doing my tutorial,I Hope You Liked It.
Zodiac Babe (Cancer)
Posted by
Crystal Belle
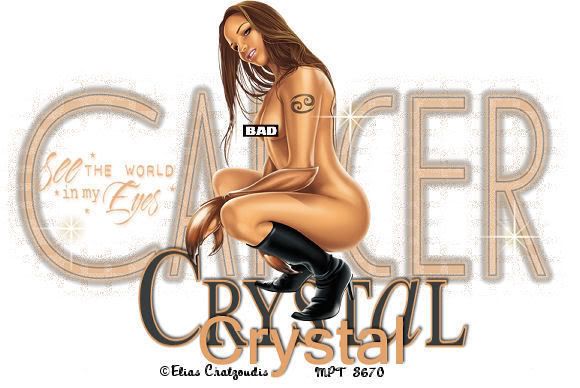 This tutorial was created on March /05/2008 by Ċrÿstàlßellĕ any resemblance to another Tag or Tutorial is purely coincidental.
 This tag was created in PSP 9 and can be done in other versions
You will need: 2 Fonts of Choice EyeCandy 4000 Gradient Glow Brush Of Choice Tube of Choice .Iam using the wonderful artwork of Elias Chatzoudis.which you must obtain a license to use at PSP Tubes Emporium
Open up a canvas size 600x800..Dont worry we will resize later..Fill in with White Pick 2 colors from your tube
Write out what Zodiac sign you are wanting to use..I used Cancer since I was born in July.Font I used was Anisette-Thin
Streatch it so its almost as about the same size as your tube Add a Gradient Glow with these settings Glow Width~8.27 Soft Corners~7 Overall Opacity~100
Drop the Opacity down to 50 on your font layer
Duplicate this layer,oh the original layer go to adjust,blur,Gaussian blur 6.00
Go to Effects Texture Effect,Mosaic-Antique With these Settings 25 25 25 10 25
Open up your tube of choice and place it where you would like it to go, I placed mine right in the center I added a Drop Shadow -2 2 75 5.00 Color Black
Add a New Raster Layer,
Choose A brush of your choice,
Place them where you would like,I placed mine around the Zodiac name,Have fun with it till you like the way it looks
Choose another font of your choice Write out your name.Place it At the bottom of your tube,Like she is sitting on it, or laying depending on what tube you used,
Use Same Drop Shadow as your Tube Add the © then merge visible your layers. Resize your tag then crop and save as a jpeg.
Thank you For trying my Tutorial
Subscribe to:
Posts (Atom)
Grab My Blinkie

Proud Member Of

People I Stalk


